|
Bat Flight
GIF Animation Workshop, part 2/2,
|


|
Nature Diary
Rocks
History
Gallery
Home Page
HERE'S how I produced the bat animation;
- I rule small rectangles, fifteen of them on each of two thin sheets of A4 paper and label them, on alternate sheets, from '1' to '30'.
- I start with just a dot, drawn with a ballpoint pen. The dot represents the position of the head of the bat. I draw it on frame '1', then position frame '2', on the second sheet of paper, over it. I can just make out the dot through the thin paper. I draw the next dot a short distance away.
- After five or ten minutes I've drawn 30 dots, one on each of the thirty frames, which take a figure of '8' tour around the rectangle. I then draw a short dash behind each dot to represent the angle of the body of the bat. I keep checking against the previous frame to ensure a smooth movement. The line becomes smaller as the bat flies into the distance. I need to draw more frames when the bat is in the distance, fewer as it rushes back towards the viewer. It is also quicker when diving than flying upwards.
- Using a brush pen, I draw all the bats on sheet one, that is all the odd numbered frames from '1' to '29'. I'm not too concerned about precise matching of images as the bat is constantly on the move. I draw the sausage-shaped body of each bat first, then the wings.
- I then draw all the bats on the other sheet of paper, the even-numbered frames from '2' to '30'. Whereas in all the odd-numbered frames the bat is shown on the forward wing-stroke, I draw all the even-numbered frames in a wings-back position. I add little 'go-faster' lines either fore or aft of the wing to try and give an illusion of fluttering.

- Using my scanner and the program Adobe Photoshop, I scan each sheet and paste them alongside each other, so I've got all the frames on screen at one time. I colour the whole sheet in Photoshop with a plain background colour, then 'flatten' the image and save it as a 'GIF'.
- I then copy and save each frame as a seperate 'GIF' file, naming them 'b1' to 'b30'.

- I use a simple animation program, Microsoft GIF Animator (which you can sometimes find included on cover CDs) to build up the animation.
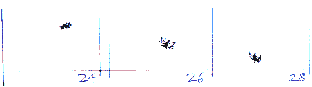
You can still see some of my ruled lines for the frames appearing along the edges of the animation.
If you feel inspired to try a cartoon, please let me know how it works out. And, if you have any success, I'd delighted to feature any, reasonably small, wildlife animations on this web-site.
Good luck!
Richard Bell,
wildlife illustrator
E-mail; '[email protected]'
Nature Diary
Wild West Yorkshire home page
|